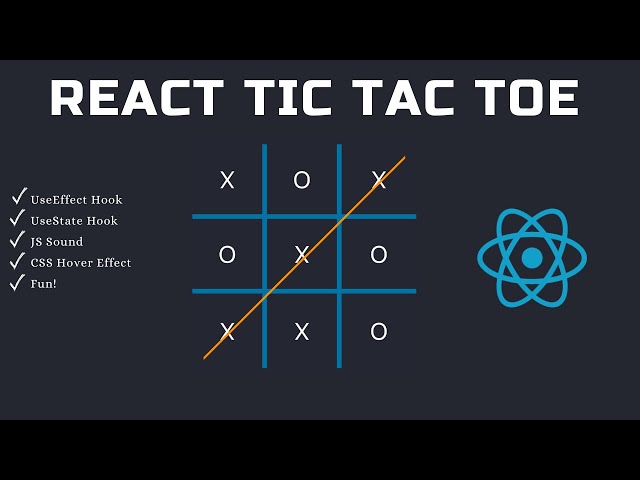
Building a Tic Tac Toe Game using React Context API with Ruby On Rails
In this tutorial, we’ll create an engaging tic-tac-toe game using React Context API. The source code for this project is available on GitHub.
For Ruby On Rails Developers
To begin, make sure you have Ruby and the latest Rails gem installed. You can create a new Rails app using:
rails new react-context-api-tic-tac-toe --webpack=react
This command generates a new Rails app in the react-context-api-tic-tac-toe folder.
Integrating Authentication with Devise
For user authentication and game score storage, we’ll utilize Devise. Follow these steps to set up authentication:
- Install Devise:
rails generate devise:install
- Create a User model with required fields:
rails generate devise User name:string email:string password:digest
- Set the root route in
config/routes.rb:
root 'homes#index'
- Add JavaScript pack tag to
layouts/application.html.erb:
<%= javascript_pack_tag 'hello_react', 'data-turbolinks-track': 'reload' %>
- Start the Rails server:
rails s
Visit localhost:3000 to see the app.
React App Development
Setting Up the UI
We’ll build the UI using Bootstrap. Include Bootstrap CSS in your HTML:
<link rel="stylesheet" href="https://stackpath.bootstrapcdn.com/bootstrap/4.3.1/css/bootstrap.min.css" integrity="sha384-ggOyR0iXCbMQv3Xipma34MD+dH/1fQ784/j6cY/iJTQUOhcWr7x9JvoRxT2MZw1T" crossorigin="anonymous">
Next, organize the components and files structure for the UI:
> tree app/javascript

app/javascript
├── channels
│   ├── consumer.js
│   └── index.js
├── components
│   ├── Canvas.jsx
│   ├── Square.jsx
│   ├── bootstrap
│   │   ├── Alert.jsx
│   │   └── NavBar.jsx
│   └── contexts.jsx
├── packs
│   ├── application.js
│   └── tictactoe.jsx
└── stylesheets
    └── styles.scss

5 directories, 10 files
Building UI Components
Let’s start by creating various UI components using React and Bootstrap:
Square Component
// app/javascript/components/Square.jsx

import React from 'react';
import SquareContext from './contexts';

export default class Square extends React.Component {
    static contextType = SquareContext;

    markActive = () => {
        if (this.props.index == this.context.state.lastMove) {
            return true;
        } else if (this.context.state.gamerSquares.indexOf(this.props.index) > -1) {
            return true;
        }
        return false;
    };

    render = () => (
        <div className={`square ${this.markActive() ? 'last-move' : ''}`}
             onClick={() => {
                 this.context.handler(this.props.index)
             }}>
            {this.context.state.squares[this.props.index]}
        </div>
    )
}
Canvas Component
// app/javascript/components/Canvas.jsx
// ... (Previous code)
export default class Canvas extends React.Component {
// ... (Previous code)
playHandler(squareId) {
// ... (Previous code)
// Handle gameplay logic
}
// ... (Previous code)
renderHeader = () => {
// ... (Previous code)
// Render header based on game state
};
startOver = () => {
this.setState(DefaultCanvasState);
};
render = () => (
<React.Fragment>
<NavBar user={this.state.currentUser}/>
<Alert/>
<div className="container p-5 text-center">
{this.renderHeader()}
<div className="mt-4 row">
<div className="col-sm-4">
{/* ... (Previous code) */}
</div>
<div className="col-sm-4">
<div className="canvas d-flex flex-wrap mx-auto">
<SquareContext.Provider value={{state: this.state, handler: this.playHandler}}>
{this.genSquares()}
</SquareContext.Provider>
{this.drawPlayAgain()}
</div>
</div>
<div className="col-sm-4">
{/* ... (Previous code) */}
</div>
</div>
</div>
</React.Fragment>
);
// ... (Previous code)
drawPlayAgain = () => {
if (this.state.gameOver) {
return (
<button onClick={this.startOver} className="btn btn-primary mx-auto mt-4">
<i className="fas fa-redo"></i>
Play Again
</button>)
}
};
}
// ... (Remaining code)
Bootstrap Components
// app/javascript/components/bootstrap/Alert.jsx

import React from 'react';

const AlertVariants = {
    notice: 'alert alert-primary',
    success: 'alert alert-success',
    error: 'alert alert-danger'
};

const Alert = (props) => (
    <div className={AlertVariants[props.type]} role="alert">
        {props.msg}
    </div>
);

export default Alert;
// app/javascript/components/bootstrap/NavBar.jsx

import React from 'react';

const NavBar = (props) => (
    <nav className="navbar navbar-expand-lg navbar-light bg-light">
        {/* ... (Navbar code) */}
    </nav>
);

export default NavBar;
// app/javascript/components/contexts.jsx

import React from 'react';
const SquareContext = React.createContext({});
export default SquareContext;
Pumping Life into the UI
Next, let’s implement the gameplay logic to enable users to play the tic-tac-toe game.
// app/javascript/components/Canvas.jsx

// ... (Previous code)

export default class Canvas extends React.Component {
    // ... (Previous code)

    playHandler(squareId) {
        // ... (Previous code)

        // Gameplay logic - updating squares, determining winner, etc.

    }

    // ... (Previous code)

    render = () => (
        <React.Fragment>
            <NavBar user={this.state.currentUser}/>
            <Alert/>
            <div className="container p-5 text-center">
                {this.renderHeader()}

                <div className="mt-4 row">
                    <div className="col-sm-4">
                        {/* ... (Previous code) */}
                    </div>

                    <div className="col-sm-4">
                        <div className="canvas d-flex flex-wrap mx-auto">
                            <SquareContext.Provider value={{state: this.state, handler: this.playHandler}}>
                                {this.genSquares()}
                            </SquareContext.Provider>
                            {

this.drawPlayAgain()}
                        </div>
                    </div>

                    <div className="col-sm-4">
                        {/* ... (Previous code) */}
                    </div>
                </div>
            </div>
        </React.Fragment>
    );

    // ... (Previous code)

}

// ... (Remaining code)
With these components and gameplay logic in place, your tic-tac-toe game using React Context API with Ruby On Rails is ready for play.
Rails Authentication Integration
To integrate Devise for authentication, follow these steps:
- Install Devise by adding it to your Gemfile:
gem 'devise'
- Run bundle install:
bundle install
- Install Devise using the generator:
rails generate devise:install
- Generate a User model for Devise:
rails generate devise User
- Run the migrations:
rails db:migrate
Now, you can use Devise for authentication in your Rails application. Make sure to customize and style the authentication views as needed.